SCIM Integration: MS Entra and DataHub
Overview
On completion of this setup the MS Entra will automatically manage the groups/users/roles from MS Entra to DataHub.
Consider following configuration in MS Entra
- A group
governance-teamgroup - And it has two memeber
johnandsid - And the group has role
Reader
If you configure the governance-team for auto provisioning, MS Entra will creates the governance-team group and it's member automatically on DataHub and set the Reader roles on users.
If you remove john from group governance-team then MS Entra will automatically removes the john from DataHub's governance-team group.
If you permanently deletes a user or group from MS Entra then MS Entra will automatically deletes the user or group from the DataHub.
MS Entra doesn't send the user's password on user creation and hence DataHub Admin need to reset their password to be able to login into the DataHub.
Only Admin, Editor and Reader roles are supported in DataHub. These roles are preconfigured/created on DataHub
Configuring User/Group/Roles provisioning from MS Entra to DataHub
Generate Personal Access Token: Generate a personal access token from DataHub.
Integrate DataHub With MS Entra: Follow steps Integrate your SCIM endpoint with the Microsoft Entra provisioning service to integrate DataHub SCIM endpoint into MS Entra.
a. Set the
Tenant URLtohttps://<hostname>/gms/openapi/scim/v2. Replace<hostname>with your DataHub instance hostname.b. Set the
Secret Tokento Personal Access Token created in Step 1.Update Attribute Mapping For Role:
a. Go to
Provisioningsection inside the App and click onProvision Microsoft Entra ID Usersas shown in below image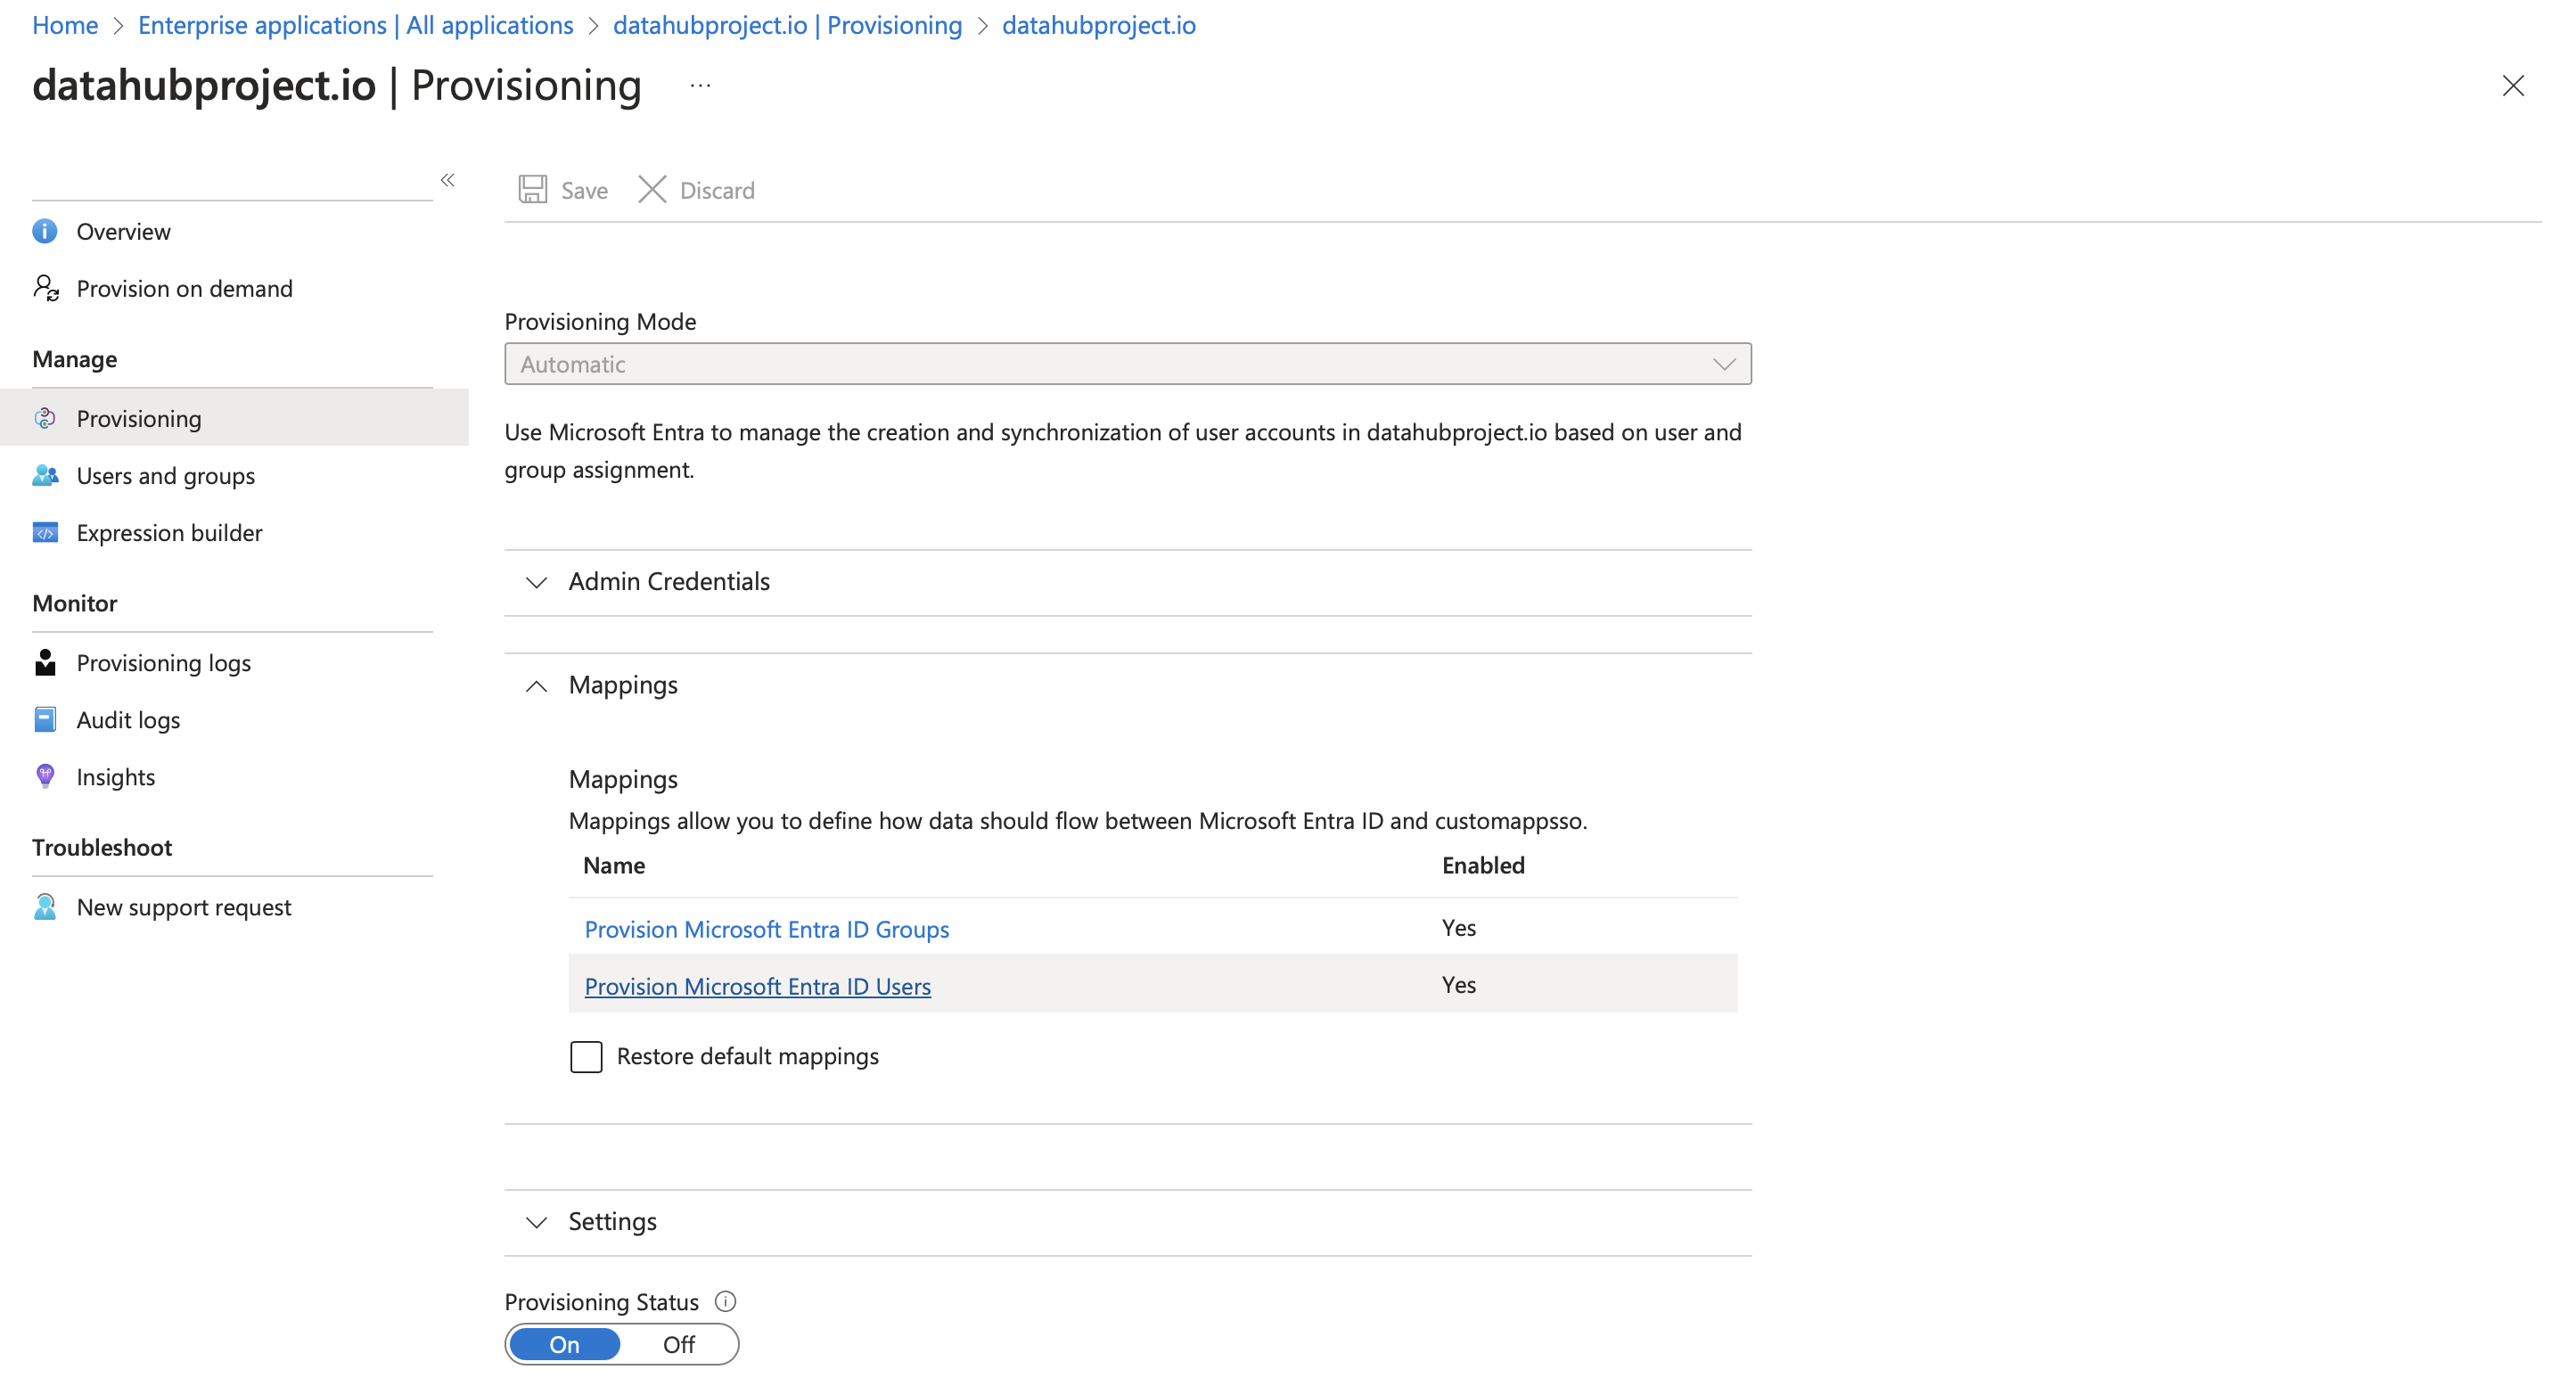
b. Click on
Add Mapping
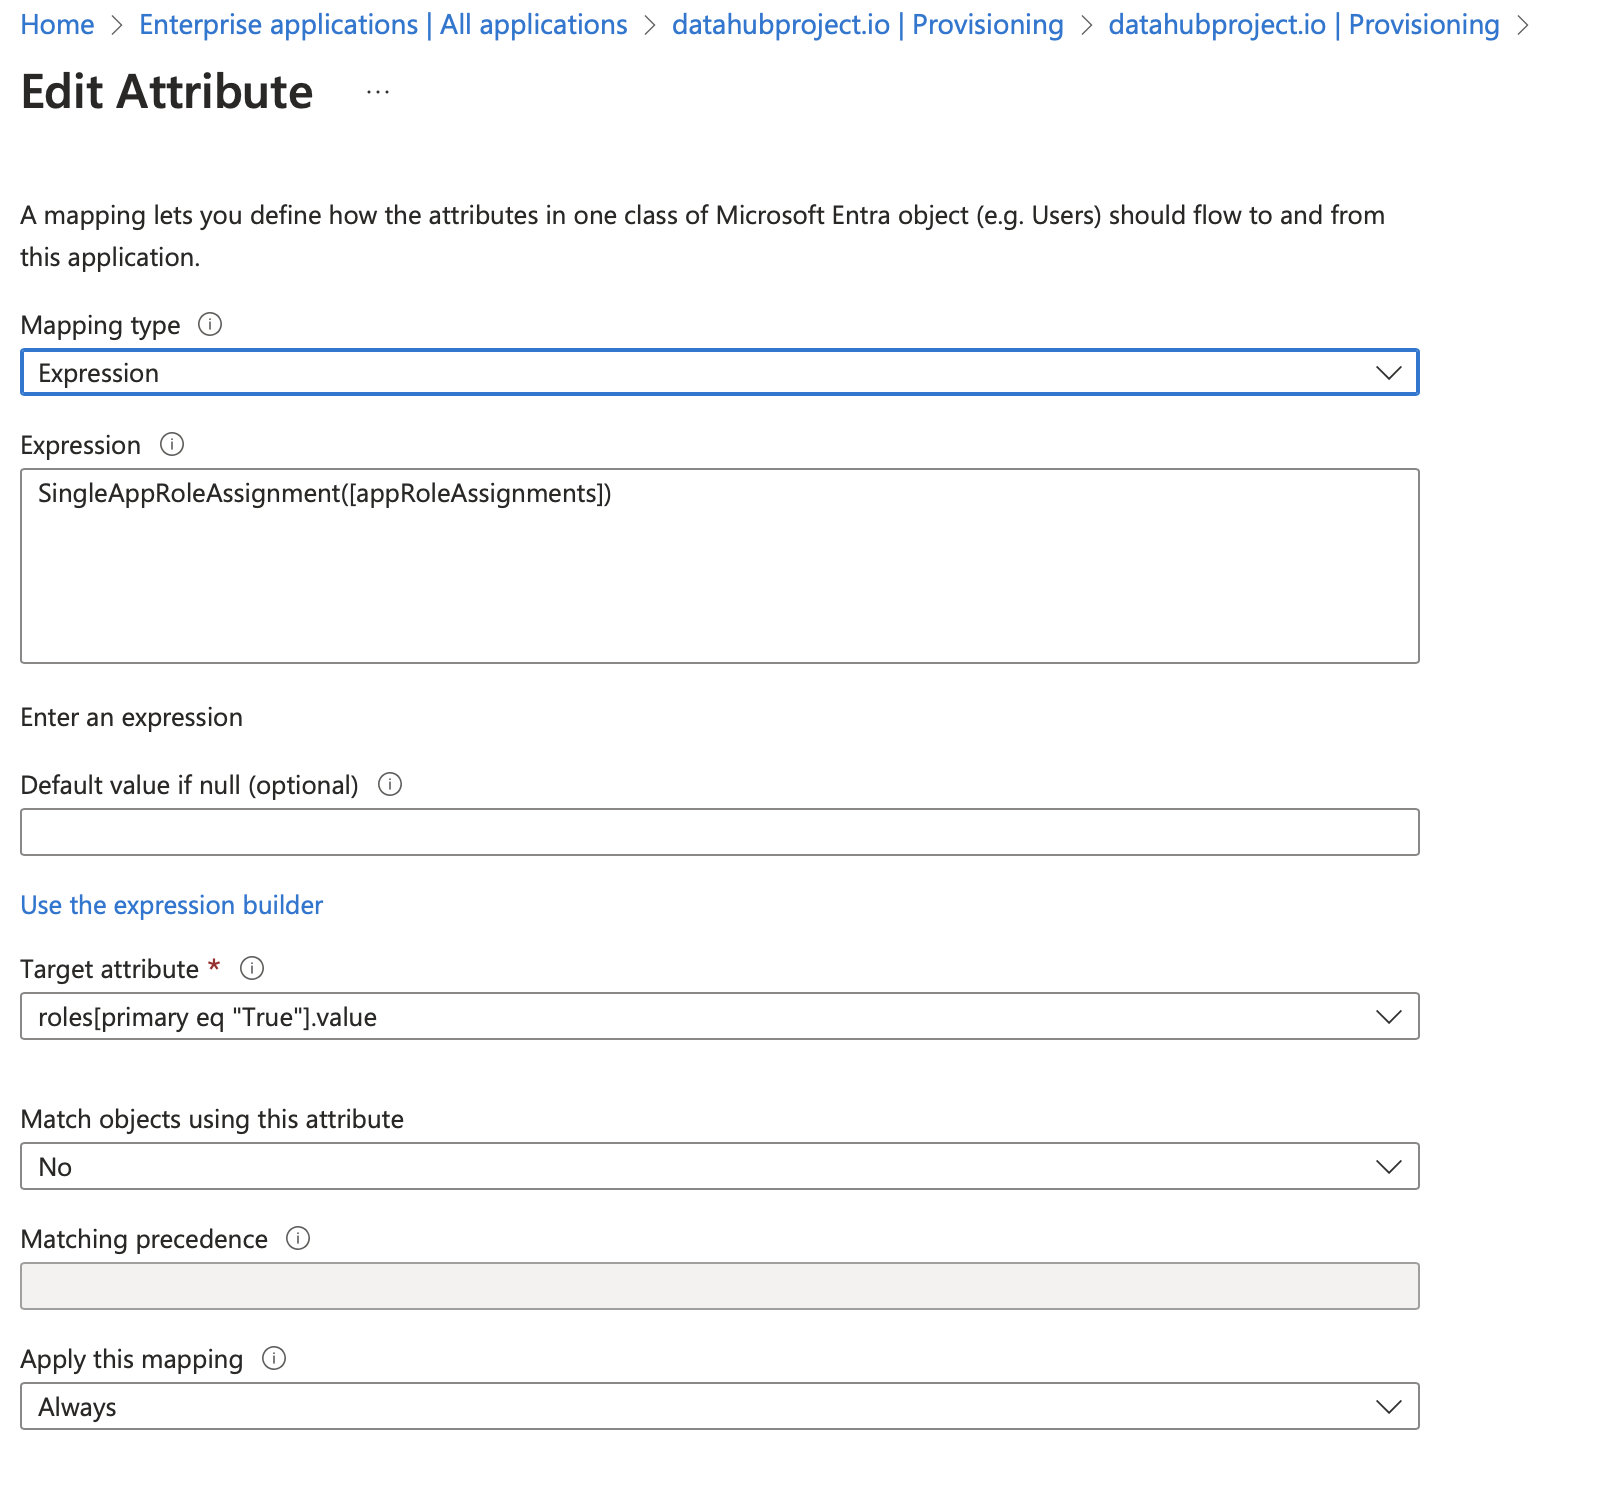
c. Fill detail as shown in below image
Fill listed fields
- Set
Mapping typetoExpression - Set
ExpressiontoSingleAppRoleAssignment([appRoleAssignments]) - Set
Target attributetoroles[primary eq "True"].value - Set
Match objects using this attributetoNo - Set
Apply this mappingtoAlways
d. Create Role: Go back to the app created in Step #1 and go to the Provisioning section and click on application registration. to create the role
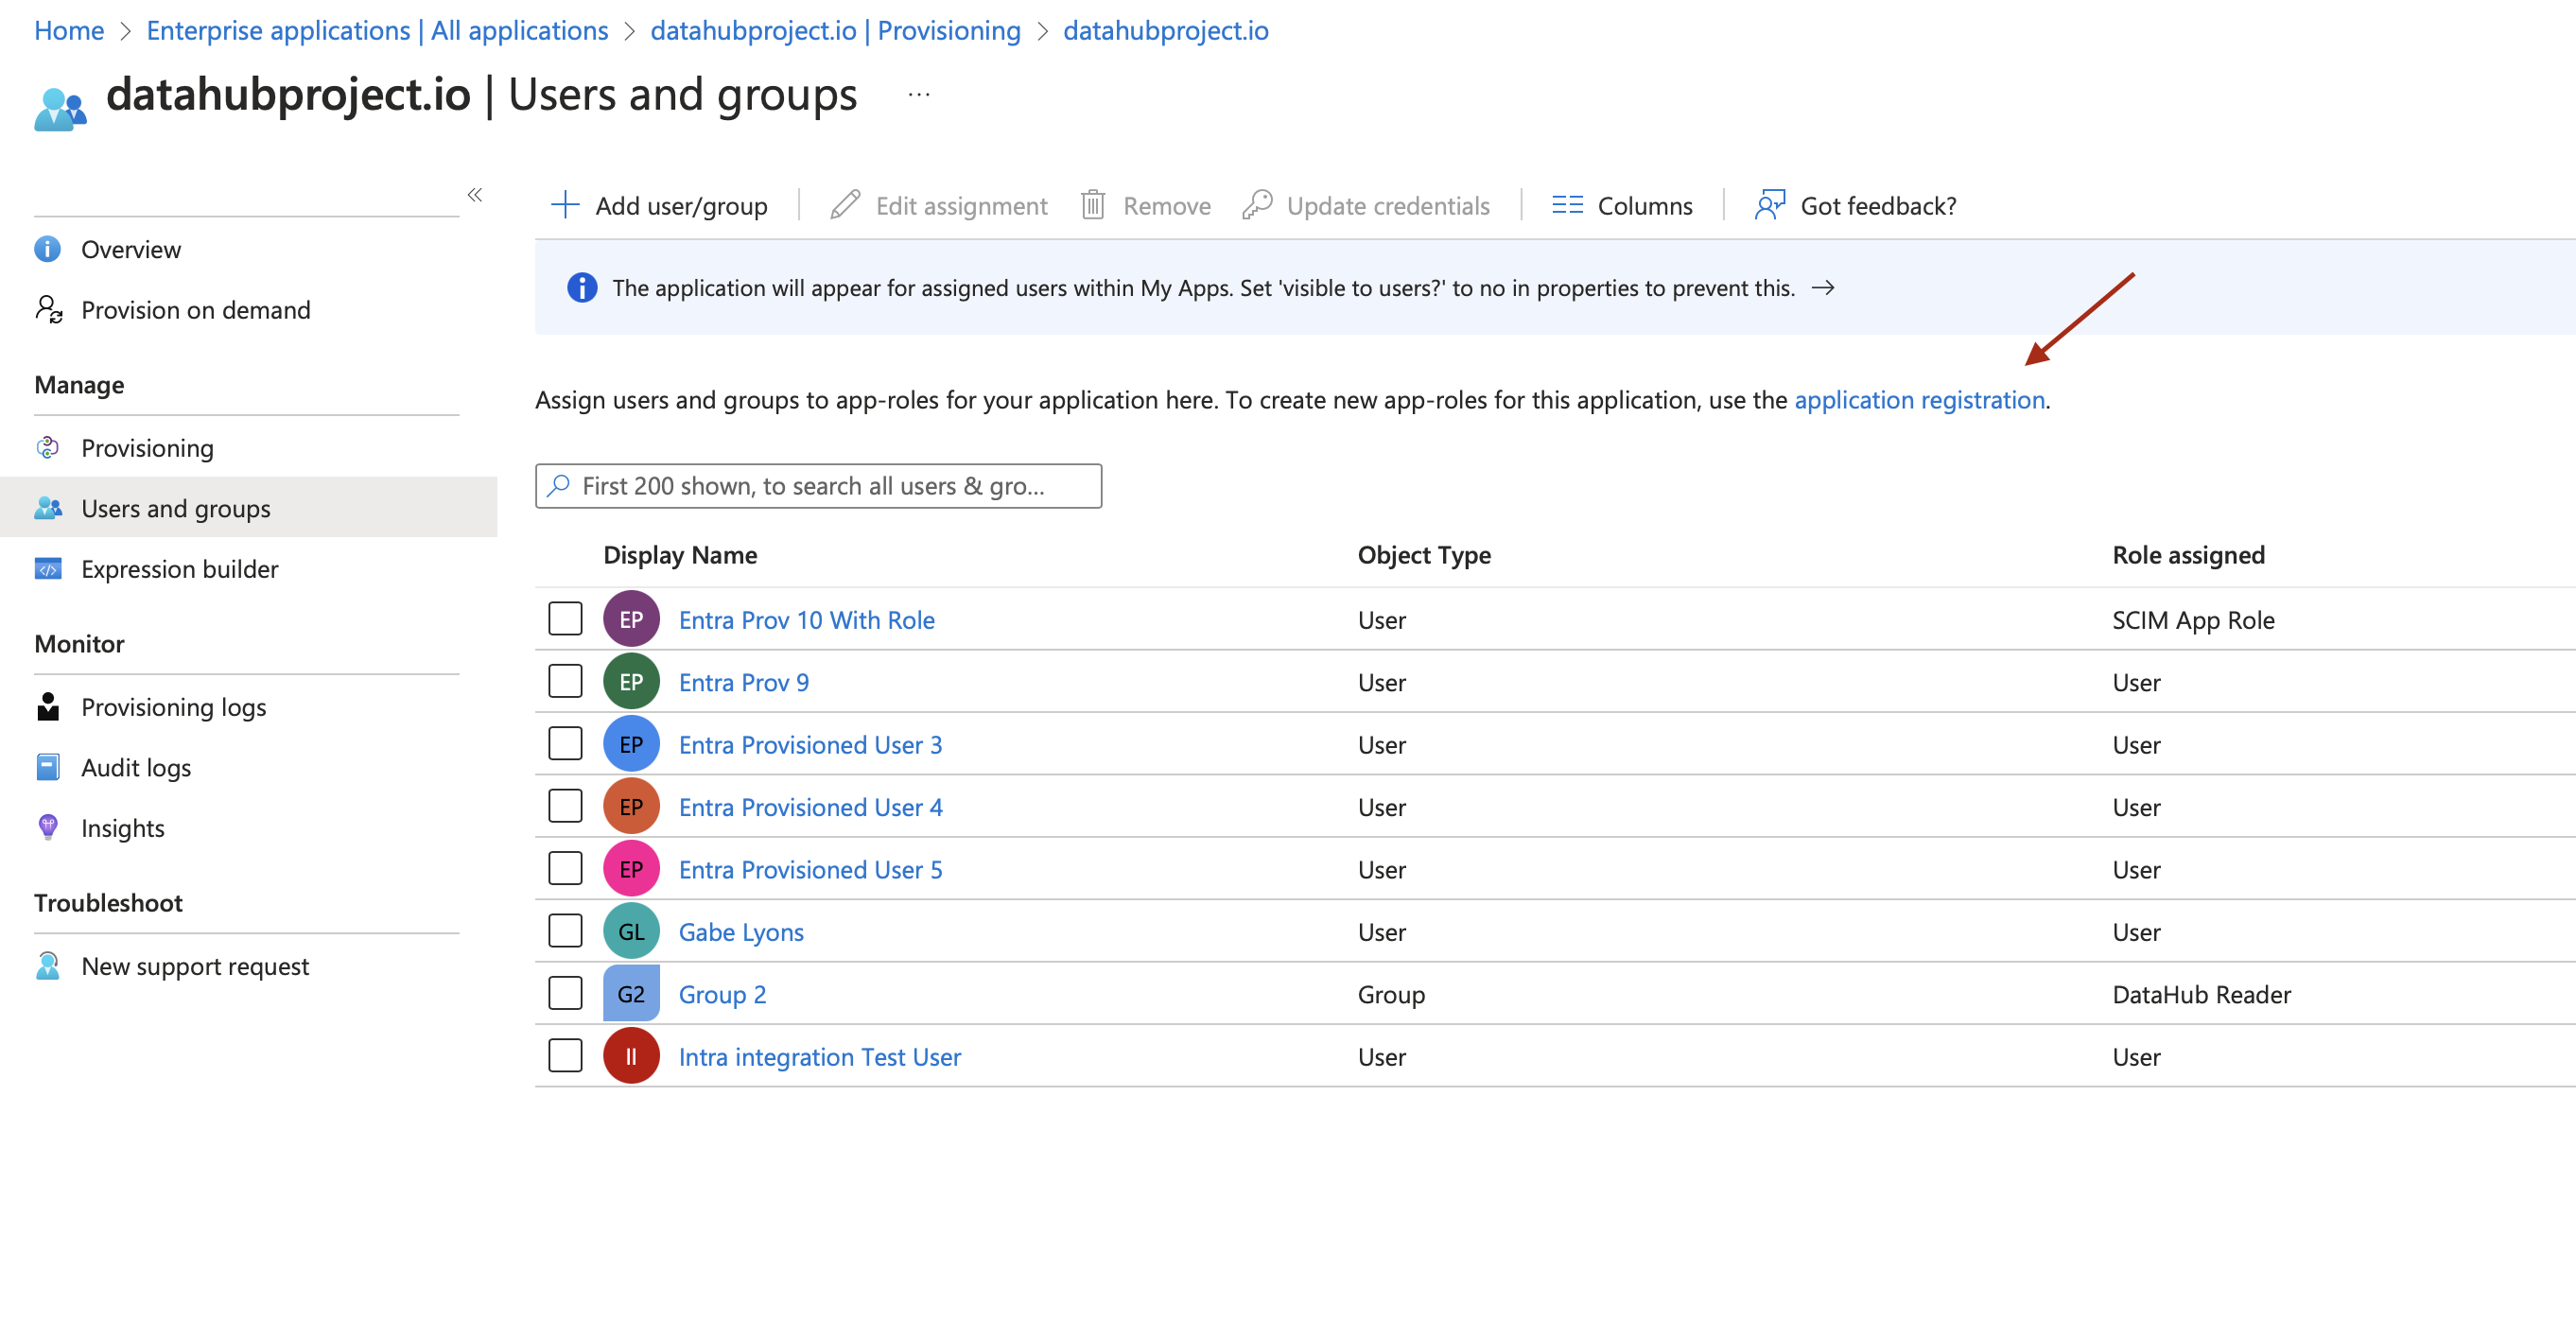
Create three roles having
Display NameandValueas mentioned below- Admin
- Editor
- Reader
Only these three roles are supported in DataHub.
e. While creating the App Role set
Allowed member typestoUsers/Groups- Set
Add Users/Groups/Roles in the App: Go to application created in step #1 and click on
Add user/groupas shown in below image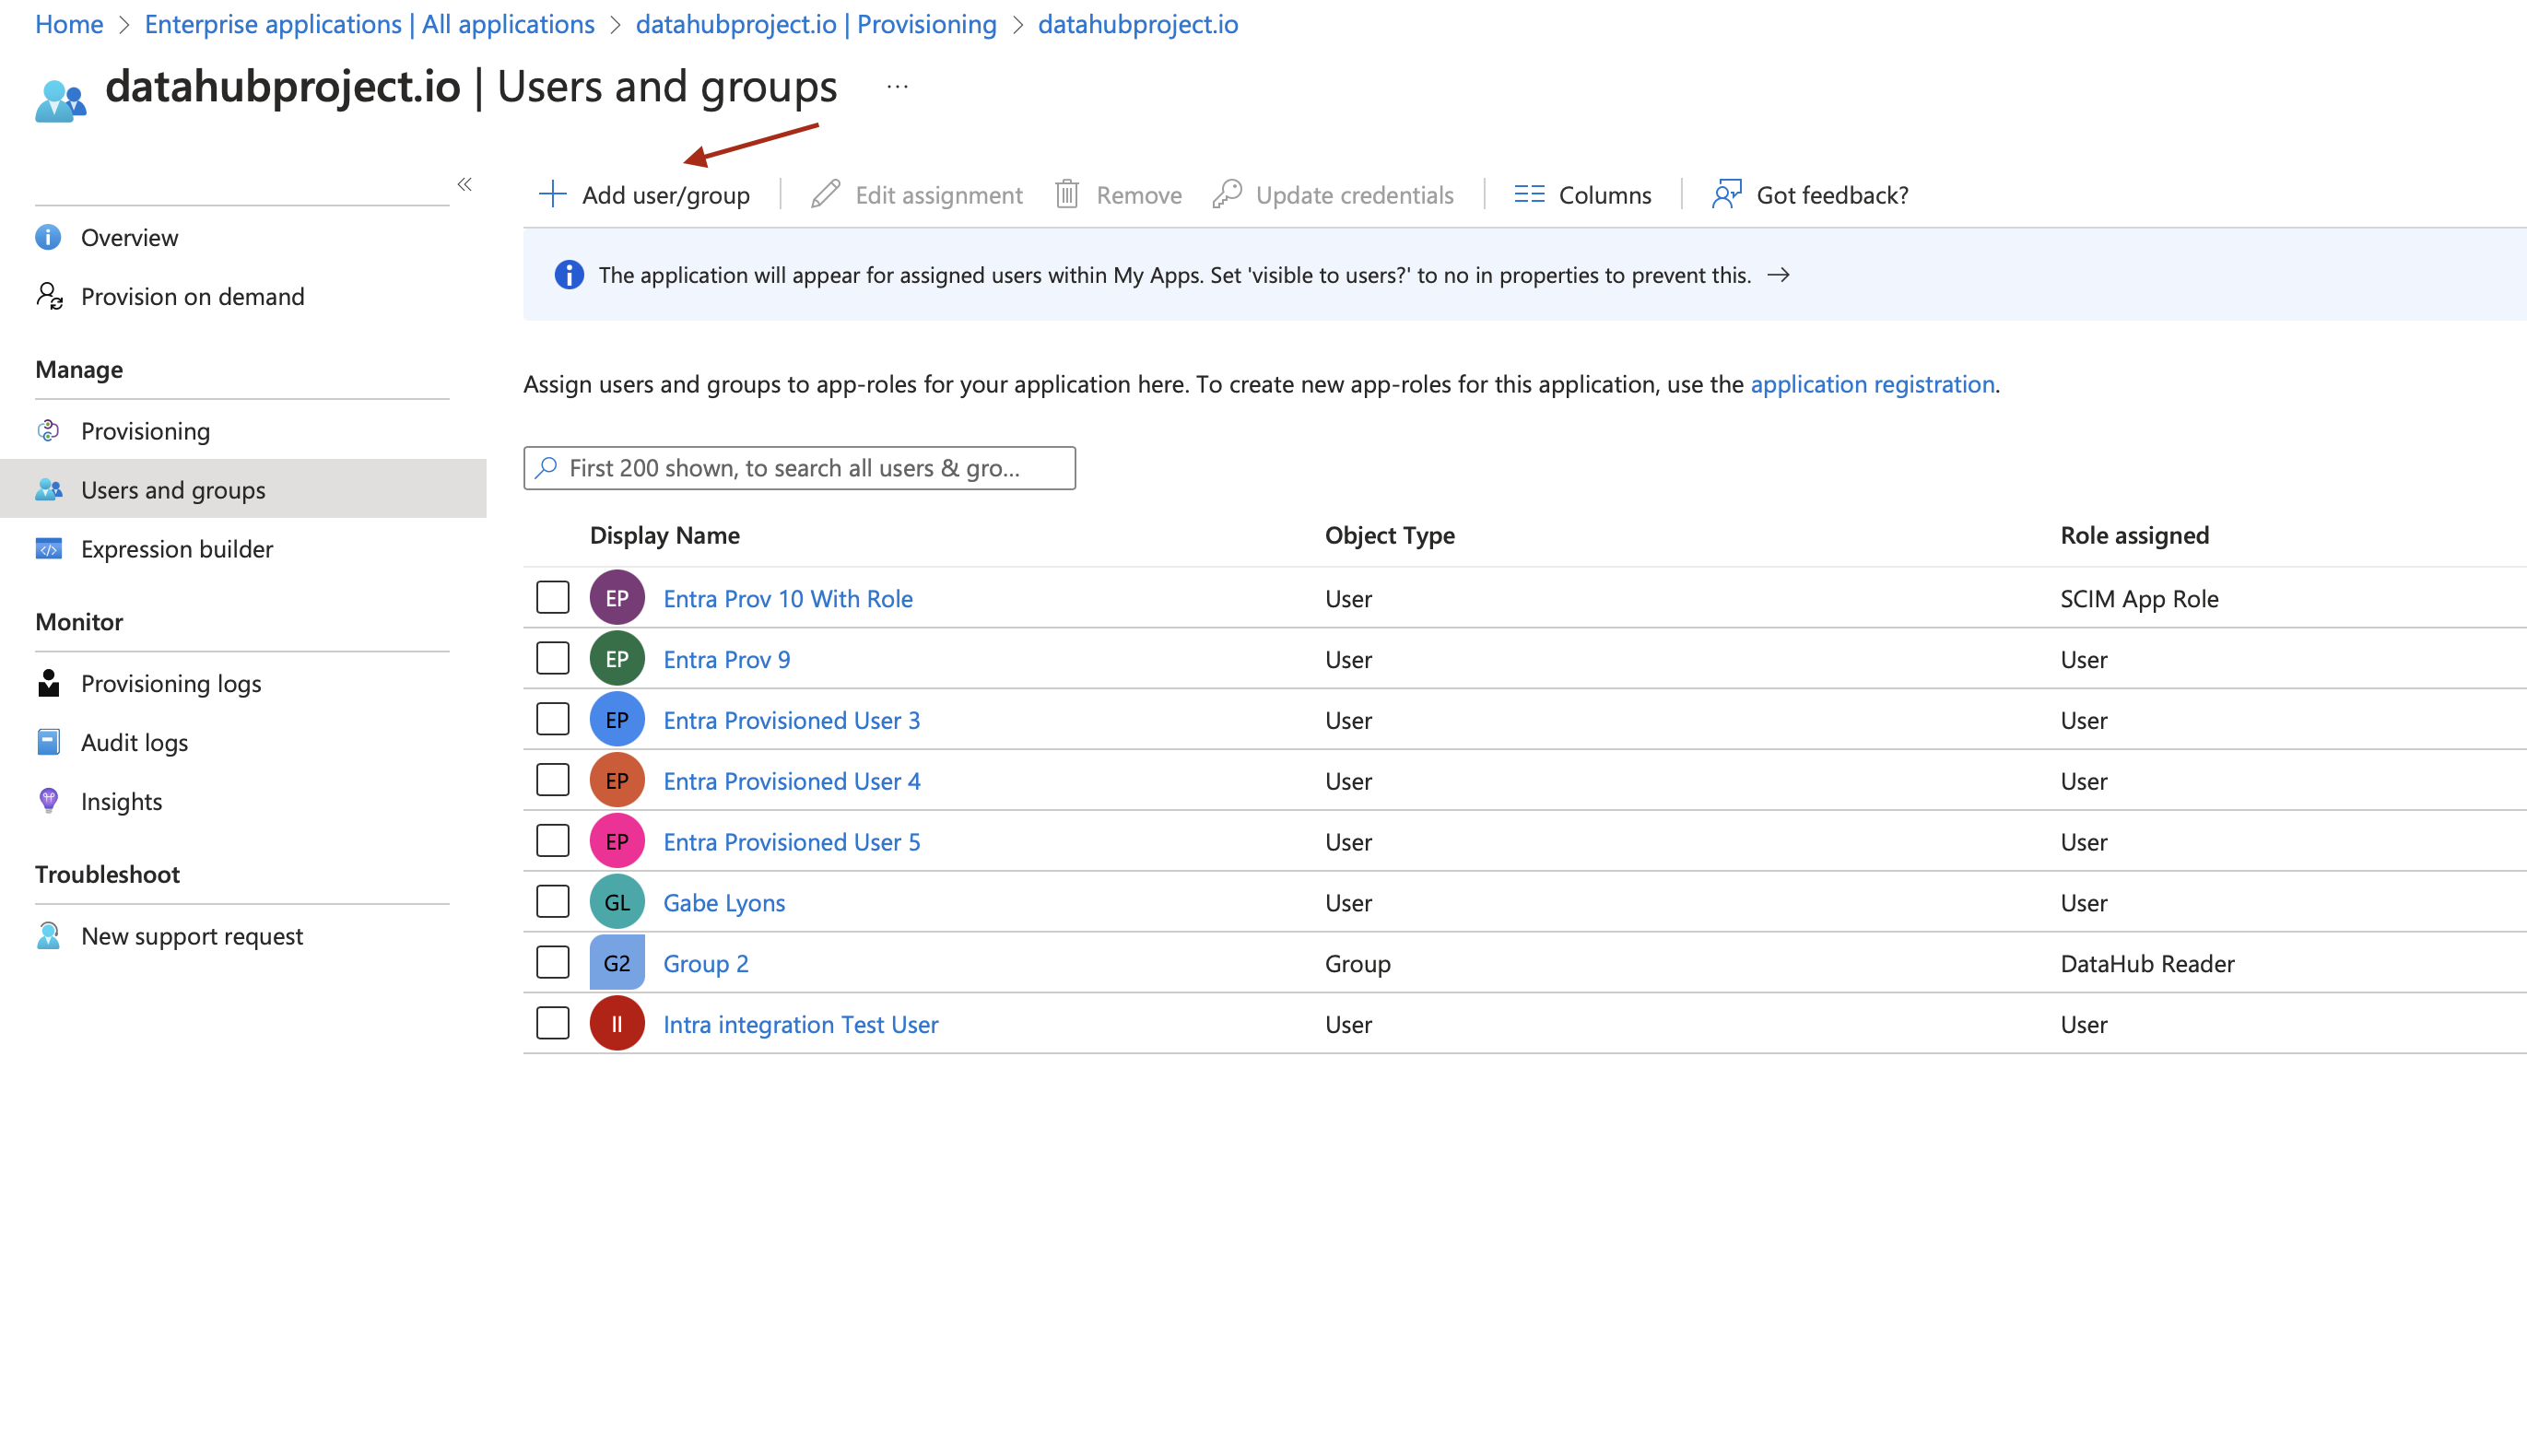
On the screen choose
- Group/User
- And role for the Group/User. The role should be one of the role created in Step 3